Can I trim a solid wood door to fit a smaller frame? In many cases, yes, but the answer depends on how much material must be removed. Solid wood allows careful trimming, unlike many hollow-core doors. However, every cut changes the door’s balance, edge strength, and hardware alignment. I have found that a small measurement error can create a visible gap or cause the latch to miss the strike plate.
This guide explains how to assess the door before cutting. You will learn how to measure the frame, mark the hinge and latch sides, and remove wood gradually with suitable tools. A sharp circular saw, fine-tooth blade, clamps, and a straightedge can produce cleaner results. Always protect the door’s finish with masking tape. Support the slab fully to prevent splintering.
Measure twice.
The frame may not be square. Check the opening at the top, middle, and bottom. Compare those measurements with the door’s width and height. Leave practical clearance for seasonal movement, especially in humid rooms. Avoid removing excessive wood from the top or bottom, where internal construction or reinforced sections may exist. That detail is easy to overlook.
The process also covers hinge adjustments, edge sealing, sanding, and test-fitting. Experienced carpenters often make several shallow passes instead of one aggressive cut. That approach takes longer, but it reduces mistakes. Still, wood can behave unpredictably, and a perfect result is not guaranteed without inspecting the door’s grain, joinery, and existing finish. When the required reduction is substantial, professional assessment may be the safer choice.
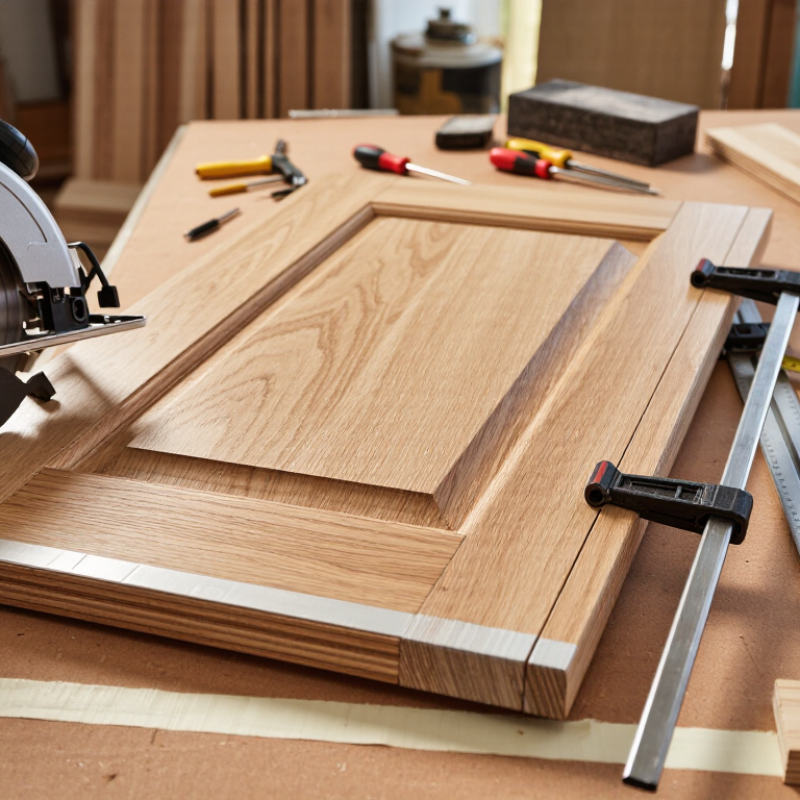
Before cutting, inspect both the solid wood door and the smaller frame carefully. Check for cracks, warping, loose joints, and previous trimming. Measure the frame at the top, middle, and bottom. Older openings are rarely perfectly square. Record the smallest width and height, not the largest. Measure the existing gaps too. A door usually needs a small clearance around its edges for movement and easy operation.
Assess which side should be reduced. Trimming the hinge edge can disturb hinge positions and weaken the stile. The latch edge is often easier, but excessive removal may affect the lockset. For height, remove material evenly when possible. Check the frame’s threshold and head clearance before marking the door. I once trusted a single measurement and cut too much. That mistake was avoidable.
Tips: Use a sharp, fine-tooth blade and support the door fully. Mark the cut line with a straightedge, then score it lightly to reduce splintering. Remove only a few millimeters at a time. Test-fit the door after each cut. Leave enough wood for sanding and final adjustment. Seal or repaint the exposed end grain, especially near a damp threshold. Do not assume the frame is square; confirm it with a level, tape measure, and diagonal checks. The final fit should open freely without rubbing, while the gaps remain visually consistent.
Trimming a solid wood door for a smaller frame starts with careful preparation.
Gather a tape measure, pencil, straightedge, clamps, and two sturdy sawhorses. You will also need a sharp saw, a block plane, fine sandpaper, and a sanding block. Painter’s tape can reduce surface splintering along the cut line. Keep wood shims nearby for leveling the door and supporting its weight.
Wear safety glasses, hearing protection, and a suitable dust mask. Use snug clothing, but avoid loose sleeves near cutting tools.
Clamp the door firmly before cutting. A stable work surface matters more than speed. Measure the frame at the top, middle, and bottom because older openings are rarely perfectly square.
Mark the required reduction on both faces of the door, then check the line twice. I once trusted a single measurement and created extra repair work.
Leave a small clearance around the door, based on the frame and floor conditions. Remove equal amounts from both sides when possible, but protect the hinge and latch positions.
Cut slowly with a fine-tooth blade, keeping the tool against the straightedge. Finish rough edges with a block plane and sandpaper.
Apply suitable wood filler only to minor defects, not structural damage.
Stop if the door shifts, the blade binds, or the cut line becomes unclear. That pause may prevent an expensive mistake.
Accurate marking matters more than fast cutting. Measure the frame at the hinge, latch, and center points. Record the smallest width and height. Then subtract the required clearances from your local door specification. A door that looks square may not be square. I measure twice, but I still recheck the hinge side before marking.
The USDA Forest Products Laboratory’s Wood Handbook, FPL-GTR-282 (2021), identifies approximately 6%–14% indoor equilibrium moisture content, depending on climate and heating. Solid wood can therefore move after installation. Leave a controlled gap instead of cutting directly to today’s opening. Mark the final line with a sharp pencil and a reliable framing square. For a cleaner edge, score the line with a utility knife. Apply low-tack tape beside the cut, not over the measurement.
Keep the cut line visible. Cut from the waste side, and mark the waste area with a clear X. On a door bottom, check the sweep, screws, and any concealed reinforcement before removing material. The Wood Handbook also confirms that wood movement differs by grain direction, so cross-grain edges deserve extra care. A fine-tooth blade usually reduces breakout. Usually. Test on scrap first, because even careful measurements can fail when the floor slopes or the frame is twisted.
How to Trim a Solid Wood Door to Fit a Smaller Frame
Measure the opening at the head, latch side, and hinge side before touching the door. Record the smallest width and height. A solid wood door should be trimmed with controlled, even cuts, not one aggressive pass. The USDA Forest Products Laboratory’s Wood Handbook, FPL-GTR-282, explains that wood movement varies by grain direction. Tangential movement is often about twice radial movement. This matters when removing material from a door that may still respond to indoor humidity.
Mark the cut line on both faces with a sharp pencil and straightedge. Score the finish first to reduce splintering. Support the door fully, then use a guided saw with a fine-tooth blade. Remove half the required amount from each edge whenever possible. Make shallow passes. Check the fit after every pass. A useful target is a small, consistent clearance, but the frame, hinges, floor, and weather seals must be checked together. Do not trust one measurement.
My first instinct would be to cut quickly, but that is where errors begin. A slightly uneven edge can make the latch bind or leave a visible wedge-shaped gap. Plane high spots carefully, then seal exposed end grain to slow moisture exchange. If the door is fire-rated, NFPA 80 requirements and the door’s listing control any modification. Cutting beyond approved limits can compromise performance. That detail is easy to miss. Recheck the swing after installation, because a door that fits on the bench may rub under its actual hinge load.
Planning values and cutting guidelines for accurately reducing a solid wood door slab while maintaining an even reveal and smooth operation.
| Step | Measurement or Task | Typical Value or Method | Practical Guidance |
|---|---|---|---|
| 1 | Measure the frame opening | Measure width and height at three locations | Measure the opening at the top, middle, and bottom for width, and at the left, center, and right for height. Use the smallest measurement when planning the final door size. |
| 2 | Typical side reveal | About 3.2 mm per side (1/8 in) | A small, even gap along the hinge and latch sides allows the door to swing without binding. Existing frames and local building practices may require different clearances. |
| 3 | Typical head reveal | About 3.2 mm (1/8 in) | Leave a consistent gap between the top edge of the door and the head jamb. Check the frame for level before finalizing the cut line. |
| 4 | Typical bottom clearance | Approximately 6–12 mm (1/4–1/2 in) | The required bottom gap depends on the floor surface, threshold, carpet, weather seals, and ventilation requirements. Measure the actual installation conditions before cutting. |
| 5 | Marking the cut line | Use a straightedge and marking gauge | Transfer the required reduction across the entire edge. Mark from a reference edge and check the line at both faces so the cut remains square and consistent. |
| 6 | Recommended cutting approach | Several shallow, controlled passes | Remove material gradually instead of attempting one aggressive cut. This reduces tear-out and makes it easier to stop at the target dimension. |
| 7 | Rip-cut setup | Use a guide, fence, or track | Clamp the guide securely and verify that it is parallel to the intended cut. Support both sides of the door to prevent movement or pinching. |
| 8 | Blade direction and tear-out control | Cut with the finished face supported | Use a sharp, appropriate fine-finish blade and score the cut line when practical. Make a test cut on scrap wood to confirm the cutting direction and finish quality. |
| 9 | Checking the cut edge | Verify square, straight, and smooth | Use a combination square to check the edge. Correct high spots with a sharp hand plane or sanding block, taking light passes along the grain. |
| 10 | Final fitting allowance | Leave a small finishing margin | Do not cut directly to the absolute opening size. Leave enough material for a final test fit, edge smoothing, and adjustment after the door is hung. |
| 11 | Hinge and latch alignment | Recheck after trimming | Confirm that the hinge leaves remain aligned, the latch enters the strike cleanly, and the door does not contact the jamb at any point in its swing. |
| 12 | Sealing exposed wood | Apply finish to every newly cut surface | Seal the trimmed edge with a compatible paint, varnish, or other finish. Coating exposed end grain helps reduce moisture absorption and dimensional movement. |
| 13 | Safety controls | Eye, hearing, and dust protection | Secure the door before cutting, keep hands away from the blade path, use dust extraction where possible, and follow the tool manufacturer's operating instructions. |
| 14 | Special door conditions | Check construction before trimming | Fire-rated, exterior, engineered, veneered, or pre-machined doors may have specific limits on edge reduction. Follow the applicable installation instructions and regulations before cutting. |
Note: These are common planning values, not a substitute for measuring the actual frame, floor, threshold, and door hardware. Test-fit the door before final finishing, and keep the reveal even along the full edge.
Test-fitting prevents an expensive mistake. Measure the opening at the top, middle, and bottom, then compare those readings with the door. Leave a consistent reveal, usually about 1/8 inch along the sides and top. Mark the hinge side carefully. Remove only small amounts, using a sharp planer or circular saw with a fine blade. Two light passes are safer than one aggressive cut.
Set the door on its hinges before final trimming. Check whether the latch aligns and whether the door swings without rubbing. Dry-fit it twice. My first attempt often looks correct until the latch reveals a slight twist. That small error matters.
The USDA Forest Products Laboratory’s Wood Handbook, FPL-GTR-282, explains that wood movement changes with moisture, while interior wood commonly reaches about 6–8% moisture content in heated spaces. Use a moisture meter when the door feels unusually swollen.
After trimming, sand the cut edges smooth and seal every exposed surface, especially the bottom edge and end grain. The WDMA I.S. 1A standard emphasizes protecting wood components from moisture exposure. Apply compatible primer or finish to the newly cut area, then allow it to cure fully. Reinstall the hinges, insert the pins, and tighten each screw without stripping the wood. Check the reveal again. Test the latch several times. Leave a pencil-thin clearance, not a forced fit.
Gather a tape measure, pencil, straightedge, clamps, sawhorses, saw, block plane, sandpaper, and sanding block. Keep painter’s tape and wood shims nearby. Measure twice.
Measure the frame at the top, middle, and bottom. Record the smallest width and height. Older openings may be uneven. Do not trust one measurement.
Wear safety glasses, hearing protection, and a suitable dust mask. Secure the door firmly on stable supports. Avoid loose sleeves near cutting tools.
Remove equal amounts from both sides when possible. Protect the hinge and latch areas. Leave a small, consistent clearance around the door.
Mark both faces with a sharp pencil and straightedge. Score the finish before cutting. Apply painter’s tape along the cut line. Use shallow, controlled passes.
Set the door on its hinges before final trimming. Check the latch, swing, floor clearance, and side gaps. Dry-fit it twice. Test the latch repeatedly.
Smooth rough edges with a block plane and fine sandpaper. Seal exposed end grain and the bottom edge. Allow the compatible finish to cure fully.
Stop cutting immediately and secure the door again. Recheck the line and measurements. Pause there. Continuing may create an expensive, uneven repair.
No. Specially rated doors may have strict modification limits. Check their approved requirements before cutting. When uncertain, ask a qualified door professional.
Wood responds to indoor moisture, and frames can carry uneven hinge loads. A door may fit on sawhorses but shift slightly after installation. Recheck the swing.
Can I trim a solid wood door to fit a smaller frame? In many cases, yes, provided the required reduction is modest and the door’s structure, hinges, hardware, and clearances are carefully evaluated first. Begin by measuring the frame and door several times to determine exactly how much material must be removed. Gather suitable measuring tools, clamps, a cutting guide, protective equipment, and materials for sealing the exposed wood. Remove the door and work on a stable, protected surface.
Mark precise cutting lines on the appropriate edges, allowing for the needed gaps around the frame. Trim gradually with controlled, even cuts rather than removing too much wood at once. After cutting, test-fit the door, check its swing and alignment, and make only minor adjustments if necessary. Smooth the edges, seal the newly exposed wood against moisture, and reinstall the hinges and hardware. A careful process helps preserve the door’s strength, appearance, and reliable operation.

Weston Door