A door gap can look minor, yet it may bring in cold air, dust, insects, noise, and unwanted light. Many homeowners ask, “Why is there a gap between my door and the floor?” The answer often depends on the door type, floor level, installation quality, and building movement. A wooden door may shrink after dry weather. A metal door may shift when its hinges loosen. Uneven flooring can also create a wider gap on one side.
This guide explores China’s top 10 door gap solutions, based on common installation practices and practical product experience. Options include adhesive weatherstripping, door sweeps, adjustable thresholds, rubber seals, brush strips, and custom-made bottom seals. Each method has a different purpose. Some reduce drafts, while others improve sound control or block insects. The correct choice depends on the gap’s size, location, and daily use.
Measure carefully.
A simple ruler can reveal more than guesswork. Check the gap at both corners and the center, because floors are not always level. In real projects, the cheapest seal is not always the most reliable. Adhesive strips may peel from dusty surfaces, while rigid sweeps can scrape delicate flooring. This article compares materials, installation methods, durability, and maintenance needs. It also points out common mistakes, because even a well-designed solution can fail when the door is misaligned. Reliable results come from accurate measurement, suitable materials, and careful fitting—not from appearance alone.
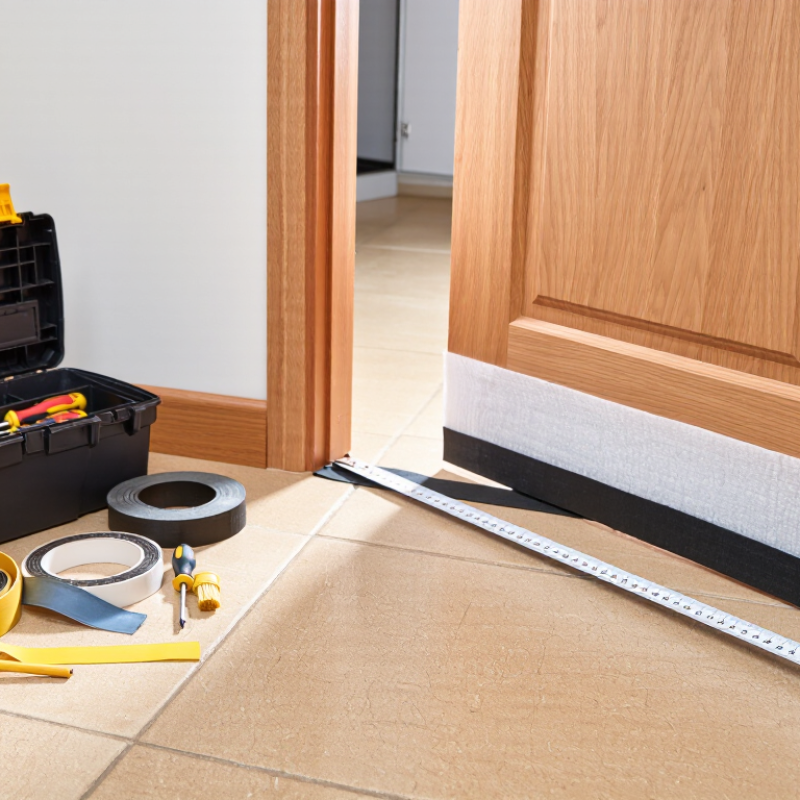
China Top 10 Door Gap Solutions: Why Is There a Gap?
A door gap is often intentional, not a manufacturing failure. The frame must stay square, while the threshold supports traffic and drainage. For many interior doors, installers commonly leave about 2–3 millimetres at each jamb and the head. This space prevents binding when timber or composite materials expand. It also reveals poor alignment quickly. A 4–5 millimetre gap may still operate, but it can leak sound, light, and conditioned air.
The bottom clearance needs more careful measurement. A practical interior target is often 6–10 millimetres above a finished floor, depending on ventilation and flooring. Carpet, tile, and uneven thresholds can change the result. NFPA 80:2022 limits the clearance below many fire door assemblies to 19 millimetres, unless the listed assembly permits another value. That is a compliance reference, not a universal installation target. The U.S. Department of Energy’s Building America guidance also stresses continuous weatherstripping and a properly adjusted threshold for reducing air leakage. Small gaps matter.
Tips: Measure after flooring is installed. Check the frame with a spirit level. Adjust hinges before cutting the door bottom. A thin light line at the latch side may indicate a twisted frame, not a bad slab. In practice, I still find installers measuring the opening only once. That habit deserves a second look.
Practical reference table for common door-gap conditions in residential, commercial, fire-rated, acoustic, and exterior applications. Dimensions are typical design ranges in millimetres; the approved door schedule, accessibility requirements, fire rating, smoke control, weather performance, and local building codes must take priority.
| No. | Door-Gap Solution | Typical Gap or Clearance | Where It Applies | Why the Gap Occurs | Recommended Action | Key Technical Note |
|---|---|---|---|---|---|---|
| 1 | Correct the door-to-frame reveal | Approximately 3 mm per side | Internal hinged doors and accurately installed door sets | The leaf needs operating tolerance so it does not bind against the jamb when the frame or door moves slightly. | Adjust hinges, pack the frame, or rehang the leaf so the reveal is even from top to bottom. | A consistent reveal is usually more important than simply reducing the gap at one point. |
| 2 | Set the head clearance | Approximately 3 mm | Between the top of the door leaf and the frame head | The frame may be out of square, the leaf may be incorrectly sized, or the hinges may be positioned incorrectly. | Check the frame diagonals and level first; adjust hinge position or resize the leaf only when permitted. | Excessive head clearance can reduce sealing, privacy, acoustic performance, and the visual quality of the door set. |
| 3 | Control the bottom clearance | Typically 6–10 mm | Internal doors with a finished floor and no threshold | Clearance is needed for floor tolerances, ventilation, carpet movement, and normal door operation. | Measure from the finished floor, not from the structural slab, then trim or replace the door only if the manufacturer allows it. | The correct value depends on ventilation, floor covering, smoke control, accessibility, and the door assembly specification. |
| 4 | Use a threshold for exterior doors | Threshold projection commonly 10–20 mm | External entrance doors exposed to rain, wind, dust, or uneven paving | An open bottom gap can allow water, air, insects, and light to pass beneath the leaf. | Install a properly levelled threshold with a compatible bottom seal and provide drainage away from the opening. | The threshold height and projection must be coordinated with weather resistance and accessibility requirements. |
| 5 | Install a compression or drop seal | Designed to close approximately 3–12 mm | Acoustic, smoke-control, privacy, and light-control doors | The required operating clearance is intentionally left open until the door closes and compresses the seal. | Select a seal whose adjustment range matches the measured gap and maintain a continuous contact line. | Do not use a seal that creates excessive closing force or prevents the latch from engaging. |
| 6 | Correct frame plumb and squareness | Target deviation: about 2 mm per metre or less | New installations and doors with tapered or uneven reveals | Movement during installation, inadequate packing, wall settlement, or inaccurate opening dimensions can twist the frame. | Check plumb, level, diagonals, and jamb spacing; re-pack and refix the frame before adjusting the leaf. | Hardware adjustment cannot reliably compensate for a severely distorted frame. |
| 7 | Allow for floor-finish build-up | Often 5–15 mm, project dependent | Projects with tile, stone, timber, vinyl, or carpet installed after the frame | The finished floor is higher or lower than the level assumed when the door was hung. | Confirm the finished-floor datum before final door trimming and protect the intended bottom clearance. | Never measure the final door gap from an unfinished slab when a floor finish will be added later. |
| 8 | Use an adjustable strike and hinges | Fine adjustment commonly 1–3 mm | Doors with minor alignment, latch, or compression problems | Hinge wear, frame movement, or small installation errors can shift the leaf away from the correct position. | Adjust in small increments, verify latch engagement, and avoid forcing the leaf against the frame. | Adjustable hardware is for fine correction, not for correcting major frame or opening defects. |
| 9 | Add a door sweep or brush seal | Typical brush or rubber contact: 2–8 mm | Dust, insects, drafts, corridor noise, and light-control applications | The bottom clearance is necessary for movement, but the open path still needs a flexible barrier. | Choose a sweep profile that contacts the threshold or floor lightly without dragging during operation. | Brush seals tolerate uneven surfaces better; compression seals generally provide tighter air and light control. |
| 10 | Coordinate fire and smoke door gaps | Common reference range: about 2–4 mm at jambs and head | Rated fire doors and smoke-control door assemblies | Fire doors require controlled clearances for reliable closing and sealing, while excessive gaps can compromise tested performance. | Measure the complete certified assembly and use only approved seals, hardware, and installation details. | Fire-door gap limits are jurisdiction- and product-specific; the tested assembly documentation and applicable code govern. |
Measurement rule: Record the gap at the top, middle, and bottom on both jamb sides, then measure the bottom clearance at several points across the opening. A door gap is not automatically a defect: it may be intentional for operation, ventilation, drainage, sealing, accessibility, or fire-performance reasons.
No. Small gaps help the frame remain square and prevent binding during material expansion. A narrow light line may indicate frame movement instead.
Installers often leave 2–3 millimetres at each jamb and the head. Gaps around 4–5 millimetres may still work, but sound and air can pass through.
A practical target is often 6–10 millimetres above the finished floor. Carpet, tile, and uneven thresholds can change the measurement. Measure again.
Flooring thickness can reduce clearance after installation. Ventilation, drainage, and threshold height also affect the final result. A door may swing freely before flooring is fitted, then scrape afterward.
Some assemblies limit the bottom clearance to about 19 millimetres. Other listed assemblies may allow different values. Check the complete approval and local requirements.
Use a calibrated feeler gauge at the top corner, latch area, and bottom corner. Keep the gauge square to the gap. Record each reading.
Yes. Measure with the door fully closed and latched. Latching can change the gap, especially when hinges or frames are loose. This detail is easy to miss.
Common causes include worn hinges, frame movement, poor shimming, or a warped door leaf. Check both vertical edges when loading appears uneven. The slab may not be the problem.
No. Check the frame with a spirit level and adjust the hinges first. Cutting too early may create excessive clearance. I still see this mistake in real installations.
Pause before making changes. Do not force the door, add unapproved material, or grind the edges casually. The frame, hinges, seals, and tolerances may need technical review.
This guide explains the fundamentals of door gaps, including the relationship between the frame, threshold, door leaf, and bottom clearances measured in millimetres. If you are asking, “Why is there a gap between my door and the floor,” the answer may involve moisture-related expansion or shrinkage, building settlement, uneven flooring, worn hinges, frame movement, poor installation, or door warping. A practical three-point inspection—checking the hinge side, lock side, and threshold—helps identify whether the gap is consistent or caused by misalignment. For fire-rated assemblies, the guide also references the 3.2 mm limit associated with NFPA 80 requirements.
It then ranks China’s top 10 door-gap solutions according to gap size, installation cost, expected durability, and suitability for different door types. Options include hinge adjustment, frame correction, threshold modification, weather seals, door sweeps, acoustic seals, replacement components, and professional realignment. Each solution is compared by its potential effect on thermal insulation, sound reduction, fire performance, security, maintenance needs, and long-term reliability, helping readers choose a safe and practical repair method.

 Weston Door