Replacing a door starts with the opening, not the door slab. A few careful measurements can prevent a frame that binds, leaves uneven gaps, or will not fit at all. Norm Abram, master carpenter and longtime This Old House host, is often associated with the workshop rule, “Measure twice, cut once.” It is simple advice, but easy to rush past.
This guide explains How to measure a door opening for a replacement, whether you are ordering a prehung unit or replacing only the slab. Measure the width at the top, middle, and bottom of the opening, then record the smallest result. Do the same for height on both sides. Use a tape measure against the inside edges of the jamb, and note the floor surface the new door must clear. Details matter.
Also record jamb depth and check whether the opening is square by comparing diagonal measurements. Unequal diagonals can signal a problem that measurements alone will not fix. If trim hides the frame, remove a small section only when you can do so safely, and follow the door maker’s instructions. A rough opening and a finished jamb are not interchangeable measurements. That distinction is easy to miss. I have seen careful notes become confusing when “width” was recorded without saying where it was measured. Keep each number labeled, take a photo, and verify the figures before ordering. Replacement work rewards patience more than guesswork.
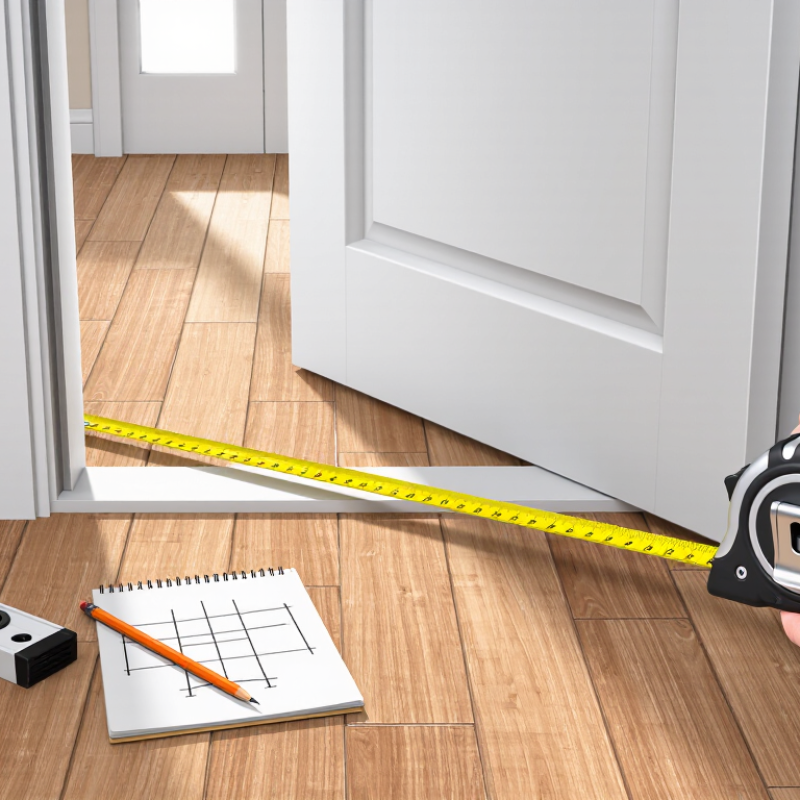
A replacement door must fit the opening, not just match the old door’s label. Decide whether you are measuring the rough opening or the existing door frame. These are different dimensions. If the frame will remain, measure the old door slab’s width, height, and thickness. Measure the door itself, not the surrounding trim. If the frame is being replaced, remove interior trim where practical and measure the rough opening between framing members.
Measure width near the top, middle, and bottom of the opening. Record the smallest figure. Do the same for height, measuring from the floor or finished threshold to the header at both sides. Note the shortest height.
Small differences matter. Check the frame depth from the interior wall surface to the exterior wall surface, excluding trim. A tape measure can bend or tilt, so keep it straight and have someone steady the other end on wide openings.
Also check whether the frame is square and plumb; compare diagonal measurements and inspect both sides with a level. An opening can look even while being slightly out of square.
I would recheck any measurement that changes by more than a small fraction of an inch, rather than relying on a rounded estimate. Write down each reading and label exactly where it was taken.
Choosing the right tools makes door measurements more dependable. Use a stiff tape measure, a level, a pencil, and a notepad. A second person can hold the tape steady, though careful solo measuring is possible. Keep a flashlight nearby for dim corners. Write each reading down.
Prepare the work area before measuring. Move rugs, shoes, and nearby furniture away from the doorway. Remove hanging items that could catch the tape. Make sure the door can open safely, and keep the floor clear. Check whether you are measuring the existing frame or the rough opening; these dimensions are not interchangeable. If trim hides the opening, do not guess at the concealed size. Confirm what the replacement requires before removing anything.
Measure the width at the top, middle, and bottom, then record the smallest value. Measure the height on both sides and through the center, from the same floor surface each time. Check the frame with a level, too; older openings can lean or bow. That detail is easy to miss. Repeat any reading that seems inconsistent, and note uneven floors or damaged trim. A neat list of measurements helps, but it cannot fix a measurement taken from the wrong reference point. It can feel fussy. That is usually a good reason to pause and check again.
Accurate door measurements begin with a steel tape, not guesswork. Remove loose trim when possible, then inspect the actual opening. Measure the width at the top, middle, and bottom. Record every number. Use the smallest width when the sides are uneven. This prevents a new door unit from binding during installation. Measure the height on both sides and through the center. Start at the finished floor and measure to the highest point of the opening. A sloped floor can change the result by several millimeters.
Depth matters too. Measure from the interior wall surface to the exterior wall surface. Check the depth at several points because old framing may twist or carry extra layers. For a prehung door, this measurement must match the jamb depth closely. Also note the wall thickness, floor covering, threshold, and remaining trim. Do not measure only the existing door slab. Its size may not represent the rough opening.
I usually write measurements in a simple table before ordering. My first measurement is rarely perfect. Recheck anything that looks unusual. Compare the smallest width, shortest height, and shallowest depth with the supplier’s requirements. Leave enough clearance for shimming, but avoid adding clearance by guesswork. A level, square, and flashlight can reveal problems that a tape measure misses. Photograph each corner. That small step helps explain unexpected gaps later.
Accurate measurements begin with the existing frame, not the old door slab. Measure the opening width at the top, middle, and bottom. Record the smallest number. Then measure height from the sill to the underside of the head at both jambs and the center. Do not guess. Small differences can affect fit.
Check frame squareness by measuring both diagonals from corner to corner. Equal diagonal measurements suggest a square frame. A noticeable difference may indicate movement, poor installation, or wall pressure. Use a level to inspect both jambs and the head. A frame can appear straight while leaning slightly. That matters.
Examine the sill closely. Look for rot, soft wood, cracks, water staining, or an uneven slope. Confirm whether the sill drains outward instead of toward the interior. Check the wall around the opening for bowed surfaces, loose trim, or damaged sheathing. These conditions can change the final rough-opening measurement. Measure the wall thickness too, especially when interior and exterior finishes differ.
Keep a written record with the date and exact tools used. Even careful measurements may disagree by a few millimeters. That is not failure. It deserves a second check. A replacement door needs clearance for shims, insulation, and minor movement. Never size it from one measurement alone.
2026 Best How to Measure a Door Opening for Replacement?
Recording Measurements to Select a Replacement Door
Accurate records make door replacement safer, faster, and less wasteful. Measure the rough opening, not only the existing slab. Remove interior trim carefully, then measure width at the top, middle, and bottom. Record the smallest width. Repeat for height on both sides and at the center. Uneven openings are common in older homes.
Measure jamb depth from the finished interior wall to the exterior wall surface. Check the door swing, hinge positions, threshold height, and available clearance. The 2024 International Residential Code commonly references a 32-inch minimum clear egress width, but local requirements can differ. Verify the applicable code before ordering. The 2024 national Cost vs. Value report estimated a 188.1% cost recoup for steel entry-door replacement. That figure makes measurement accuracy more important, not less. A wrong order can erase the expected value quickly.
Tips: Write every dimension in the same unit. Use a steel tape, not a flexible ruler. Take photos beside each measurement. Note plumb, level, moisture damage, and insulation gaps. Measure twice. I still find small errors after the first pass, especially near old thresholds. Leave room for shims and adjustment. Never assume a “standard” opening fits without checking the actual frame. Keep the record with the date, wall thickness, swing direction, and your smallest measurements.
| Measurement Item | Where to Measure | Reading 1 | Reading 2 | Reading 3 | Recorded Value | Replacement Door Selection Note |
|---|---|---|---|---|---|---|
| Rough Opening Width | Between the left and right framing studs, measured at the top, center, and bottom | 38 1/8 in (968 mm) |
38 in (965 mm) |
37 7/8 in (962 mm) |
Use the smallest width when confirming the replacement unit and required clearance. |
| Rough Opening Height | From the subfloor or finished floor to the underside of the header at the left, center, and right | 82 1/2 in (2096 mm) |
82 3/8 in (2092 mm) |
82 1/2 in (2096 mm) |
82 3/8 in (2092 mm) |
Use the smallest height; account for the threshold, floor covering, and installation clearance. |
| Existing Door Slab Width | Measure the door panel from its left edge to its right edge, not including hinges or weatherstrip | 35 3/4 in (908 mm) |
— | — | 35 3/4 in (908 mm) |
The replacement slab should match the existing size if the frame will remain. |
| Existing Door Slab Height | Measure from the bottom edge to the top edge of the door panel | 79 1/2 in (2019 mm) |
— | — | 79 1/2 in (2019 mm) |
Confirm the replacement height with the frame, threshold, and finished-floor conditions. |
| Jamb Depth | Measure from the interior trim edge to the exterior trim edge across the frame | 4 9/16 in (116 mm) |
4 9/16 in (116 mm) |
4 1/2 in (114 mm) |
4 1/2 in (114 mm) |
Select a compatible jamb depth or plan for jamb extensions or modifications. |
| Wall Thickness | Measure the finished wall thickness at the top, middle, and bottom of the opening | 5 1/2 in (140 mm) |
5 1/2 in (140 mm) |
5 5/8 in (143 mm) |
5 1/2 in (140 mm) |
The jamb must cover the wall thickness without leaving an exposed gap. |
| Opening Squareness | Measure both diagonal distances from opposite corners of the rough opening | 85 7/8 in (2181 mm) |
86 in (2184 mm) |
Difference: 1/8 in (3 mm) |
Acceptable for review | A larger diagonal difference may require shimming or frame correction before installation. |
| Hinge Side and Swing | Stand outside facing the door; note the hinge side and the direction the door opens | Hinges: Left | Opens Inward | Inswing | Left-hand inswing | Order the replacement configuration to match the required swing and hinge position. |
| Threshold Condition | Inspect the sill for height, slope, damage, and water drainage | Height: 1 1/2 in (38 mm) |
Slope: Outward | Condition: Sound | Reuse if compatible | Replace or modify the threshold if it is damaged, level, or incompatible with the new door. |
| Required Rough Opening Summary | Final measurements used for replacement-door planning | Width: 37 7/8 in (962 mm) Height: 82 3/8 in (2092 mm) |
Record verified | Recheck all measurements after removing trim and before placing an order. | ||
Measure the rough opening, not just the door slab. The slab may not match the frame.
Measure at the top, middle, and bottom. Record all three. Use the smallest measurement.
Measure both sides and the center, from the finished floor to the highest point. A sloped floor can change the result.
Measure from the finished interior wall to the exterior wall surface. Check several spots because old framing can twist.
Note wall thickness, floor covering, threshold height, door swing, and hinge positions. Add the date and take corner photos.
Use a steel tape, level, square, and flashlight. A tape alone may miss a tilted frame.
Allow room for shims and adjustment. Don’t add clearance by guesswork; compare your measurements with supplier requirements.
Write every dimension in the same unit and recheck unusual numbers. I sometimes miss small differences near old thresholds. Measure twice.
Learning How to measure a door opening for a replacement begins with understanding the difference between the rough opening, the existing frame, and the actual door size. Before measuring, gather a reliable tape measure, level, square, pencil, and notepad, then clear the work area for safe and unobstructed access. Measure the width at the top, middle, and bottom, followed by the height on both sides and in the center. Record the smallest width and height to help ensure the replacement door will fit properly.
In addition to basic dimensions, check the opening depth, frame condition, sill, and surrounding wall surfaces. Use a level or square to identify uneven, bowed, or out-of-square areas that may require adjustment before installation. Note whether the sill slopes correctly and whether the frame shows damage, moisture, or movement. Carefully organized measurements and observations will make it easier to select a properly sized replacement door and prepare for a smoother installation.
Weston Door